
This guide helps you set up your window-cleaning work, get through a round and finish the paperwork in Pane Planner on iPhone, iPad and Mac. It covers the released iPhone and iPad app, version 2.0.1, and Mac app, version 2.0.
In this guide, choose means tap on iPhone or iPad, or click on Mac. Words in bold are the names of controls or screens. Where Mac controls are different, they are listed separately.
1. Get started and find your way around
A customer holds the details of the person or property you clean. A round groups customers in the order you work them. A visit records what happened on one occasion. A draft is unfinished work, not a saved visit.
Use iPhone while you are out, iPad when you want more room, or Mac for planning and paperwork with a mouse and keyboard. You do not need a Mac to use the full iPhone or iPad app. Optional private iCloud sync connects supported records across your own devices; without it, each device keeps its own records.
- Today shows work that is due, overdue or coming up.
- Rounds helps you organise customers and their order.
- Customers lets you find a record and start a visit.
- New on iPhone and iPad creates a customer or round. You can also use the plus buttons on those lists.
- Settings holds business details, exports, sync, archives and Pro options.
On Mac, use the sidebar to move between Today, Customers, Rounds, History and Saved drafts. Select a row to read its details. If a detail panel feels cramped, widen the window or adjust the divider between the list and details.
Use the save action on a form to finish the job. Saving a draft or closing a keyboard is not the same as adding a customer or saving a visit. If the app shows an error, read it before leaving the screen and check that the finished record appears in its list.
2. Set up your first round
Choose a name you will recognise on a working morning, such as “North Hykeham” or “Friday four-weekly”. You can change the name later.
- On iPhone or iPad, open Pane Planner and follow the first-round setup if it appears.
- Enter a Round name.
- Enter the First customer or property.
- Expand Optional address, contact, and schedule if you want to add those details now.
- Choose Open Today to create the starting round and customer.
To create a round from the main app on iPhone or iPad, open Rounds and choose the plus button. Alternatively, open New and select Round. Enter the name and any notes, then choose Add round.
On Mac, open Rounds, choose New Round, enter the title and notes, then choose Save.
Starter supports one active round and up to 30 active customers. Reaching a limit does not stop you reading existing records. If you need room, review your archived and active records or open Pane Planner Pro; do not delete useful history simply to get past a limit.
3. Add a customer and their repeat schedule
- On iPhone or iPad, open Customers and choose the plus button. On Mac, open Customers and choose New.
- Enter a customer or property name that you will recognise.
- Choose a round, or leave the customer Unassigned if you will organise them later.
- Add the contact number and address details you need.
- Choose whether the work repeats or is a one-off job.
- For repeating work, set the repeat interval and next due date.
- Add a usual price, service notes and access notes where useful.
- Choose Add customer on iPhone or iPad, or Save on Mac.
On iPhone and iPad, some optional fields sit inside sections such as Address and contact; expand the section to see them. For example, service notes might say “Windows and frames”, while access notes might say “Side gate on the left”. Avoid putting passwords, alarm codes or unnecessary personal information in notes.
Repeating or one-off work?
Choose recurring work for a customer you expect to visit regularly. The next due date is when you next intend to clean; the repeat interval controls later dates. Choose one-off work for a job that should not create another due date after you record the visit.
A complete house name or number, street, town and postcode makes the address easier to find in Apple Maps. A customer can still be saved without a usable address, but route tools may leave them out until you correct it.
4. Import customers from a spreadsheet
If you already keep a customer list, save the sheet as a CSV file before importing it. An Excel or Numbers workbook is not the same as a CSV. Keep your original file so you can return to it if you need to correct anything.
Prepare the file
- On iPhone or iPad, open Settings.
- Open Storage and exports.
- Choose Download customer import template if you want an example of the expected columns.
- Fill in one customer per row in your spreadsheet, or prepare your existing customer sheet.
- Save or export that sheet as a CSV file.
You can use your own column headings: the import screen lets you match them to Pane Planner fields. Each customer needs a name. Leave optional fields unmapped if your file does not contain them.
Map the columns and review the result
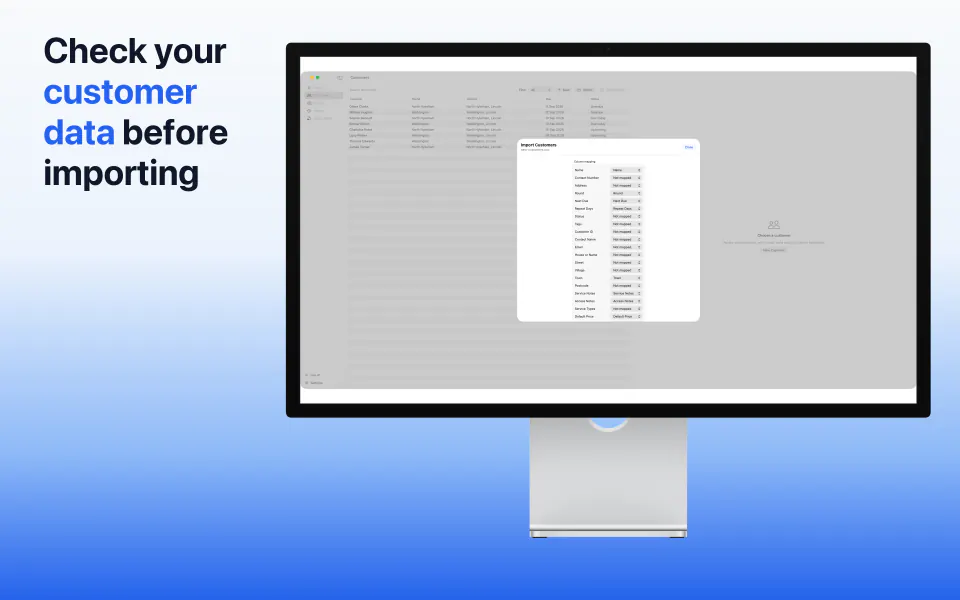
- On iPhone or iPad, choose Import customers CSV in Storage and exports. On Mac, open Customers and choose Import.
- Choose your CSV file.
- Check the suggested column matches, especially the customer name, round, address and dates.
- Choose Continue on iPhone or iPad, or Review Import on Mac.
- Check how many customers will be created, updated or skipped, and how many rounds will be created.
- Review the rows with errors or a decision to make.
- Choose the appropriate customer action and round for each affected row.
- Choose Apply on iPhone or iPad, or Apply Reviewed Import on Mac, only when the proposed result is right.
- Check the completion summary, then open Customers to check a few imported records.
Choosing a file does not immediately add its customers. If Apply is unavailable, look for missing names, invalid values, unresolved matches or a capacity warning. You can skip a row you are not ready to import. If the source file needs correcting, cancel, fix the CSV and start again.
Do not choose to create a new customer when the row should update an existing one. Check names and addresses rather than assuming every suggested match is correct. The import result offers Undo import, or Undo Last Import on Mac; use it promptly if you spot a mistake and read any warning if records have changed since the import.
5. Plan your day
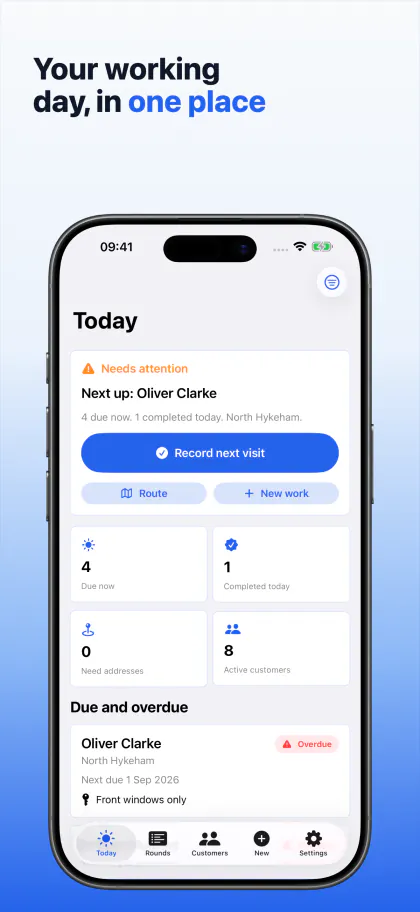
- Open Today.
- Review due and overdue work before looking at upcoming customers.
- Open the customer you intend to visit.
- Read the access notes, service notes and previous visit before starting.
- Record the visit when you know its outcome.
Today also helps you spot missing addresses and work completed today. A due date is a planning reminder, not a timed appointment or a message sent to the customer.
Focus on one part of the work
- Open the filter control on Today.
- Choose the rounds, due statuses, due-date limit, tags or missing-address filter you need.
- Return to Today and review the smaller list.
- Clear the filters when you want to see the whole day again.
With Pro, you can save a useful dashboard filter with a name and use it again. If a customer appears to be missing, check for active filters before creating another copy.
6. Find and update a customer
- Open Customers.
- Search for the customer, property or another detail you remember.
- Use All, Due, Overdue or No address to narrow the list if needed.
- Open the customer record.
- Choose Edit.
- Change the details you need, then choose Save.
The customer record brings together their address, work notes, usual price, next due date and visit history. Changing the usual price is for future work; check the amount on an existing visit rather than assuming old records have been rewritten.
Before travelling, use the customer’s Maps action to check the destination. If it opens the wrong place, return to the customer, correct the address and try again.
7. Put a round in the right order
Keep a round in the order that works for you, including access arrangements and your local knowledge.
- Open Rounds.
- Choose the round you want to organise.
- Check which customers belong in it.
- On iPhone or iPad, use Edit to reorder the customer list. On Mac, select a customer and use Move Up or Move Down.
- Finish editing and check the displayed order.
To change the round’s name, notes or membership, choose Edit round on iPhone or iPad, or Edit on Mac. Review any customer moves before confirming them. A customer’s previous visits retain their recorded history; moving their current round does not rewrite where earlier work happened.
8. Review a suggested route
- Open a round.
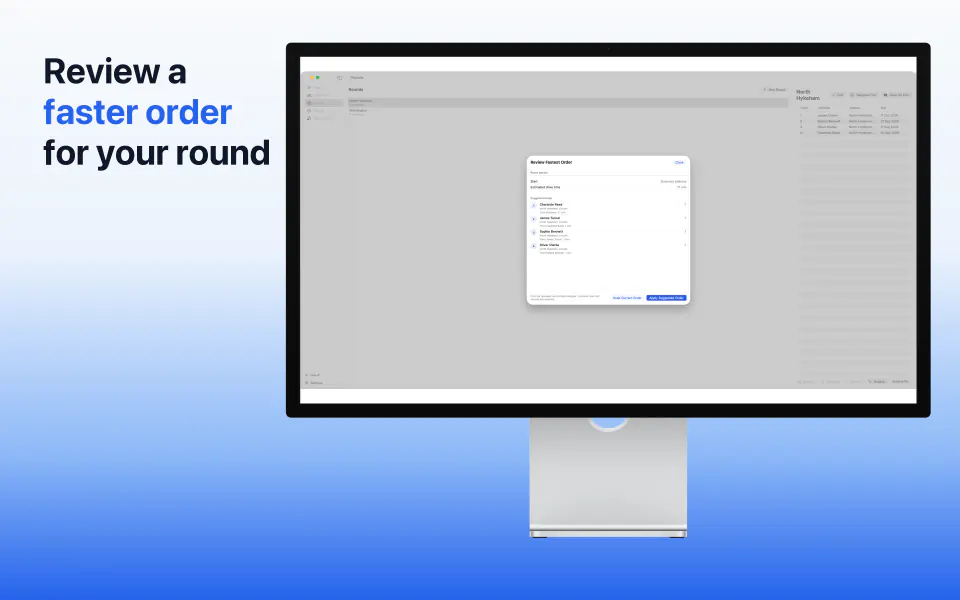
- Choose Suggest fastest order, or Suggest Fastest Order on Mac.
- Wait for the suggestion to finish.
- Check the starting point and estimated driving time.
- Review the proposed customer order and any addresses marked for attention.
- Choose Apply Order on iPhone or iPad, or Apply Suggested Order on Mac, if you want that order.
Choose Cancel on iPhone or iPad, or Keep Current Order on Mac, to leave the existing order in place. A suggestion is a planning aid, not a promise of the fastest possible journey. Check access times, parking and anything the map cannot know.
If customers are left out because their addresses could not be used, correct those addresses before requesting another suggestion. Pane Planner uses Apple Maps services when you request a route action.
Open the route in Maps
Choose Navigate first stop on iPhone or iPad, or Navigate First on Mac, to open the first destination. Open all pins, or Open All Pins on Mac, opens available customer locations. Check what Apple Maps displays before starting: seeing several pins is not the same as having a complete turn-by-turn itinerary.
9. Record a visit and its outcome
- Open the customer.
- Choose Record visit, or Record Visit on Mac.
- Choose the outcome that describes what happened.
- Check the visit date and amount.
- Add a note if it will help explain the work later.
- Check the next due date or choose the replacement date requested.
- Choose Save visit, or Save Visit on Mac.
- Check the saved visit in the customer’s history.
Which outcome should you choose?
- Completed: the work is finished. For repeating work, the next interval starts from the recorded completion date.
- Skipped: this occurrence was missed, but you want to keep the established repeat pattern.
- Deferred: you will return on a different date. Choose the replacement due date instead of treating the job as completed.
- Partial: some work is done and some remains. Check the follow-up date shown and explain the unfinished work in the notes.
For one-off work, saving the visit does not schedule another visit. Always check the date shown before saving, particularly if you are recording an older job or changing a plan because of weather.
The amount is part of the visit record. It does not take a payment or confirm that the customer has paid. Do not use it as a substitute for checking your bank or your own payment records.
10. Return to unfinished work
Pane Planner keeps drafts for supported unfinished forms, including visit recording. A draft lets you return after an interruption; it does not mean the final customer, round or visit has been saved.
- On iPhone or iPad, open Settings, then Saved drafts, or choose Review saved draft from Today.
- On Mac, open Saved drafts in the sidebar.
- Choose the draft you want to continue.
- Read its status and any warning about changes to the original record.
- Choose Resume or Resume draft when offered.
- Check the form, finish the work and use its save action.
If the customer or round has changed since the draft began, do not assume the old details are still correct. Where Start again is offered, it starts from the current record; read the warning before replacing unfinished work.
Use Discard draft only when you no longer need that unfinished work. It does not delete the saved customer or their existing visits. On Mac, cancelling an edited form may offer Keep as Draft, a discard choice and Keep Editing; choose according to whether you want to return later, abandon the changes or carry on.
11. Add proof photos with Pro
- Start recording the visit.
- On iPhone or iPad, choose Choose proof photos. On Mac, choose Choose Existing Images….
- Select the images for this visit.
- Check each image and add a caption if it needs explanation.
- Use the photo controls to reorder, replace or remove an image if needed.
- Check which images are marked for inclusion in documents.
- Save the visit.
On iPhone and iPad, Earlier and Later change the order. On Mac, use Move Up and Move Down. The Mac app uses existing files; it does not take a photo.
Keeping a photo with a visit and including it in a customer PDF are separate choices. Check the PDF selection before sharing. Use images you have permission to keep and avoid including people, house interiors or other private details unnecessarily.
12. Find an earlier visit
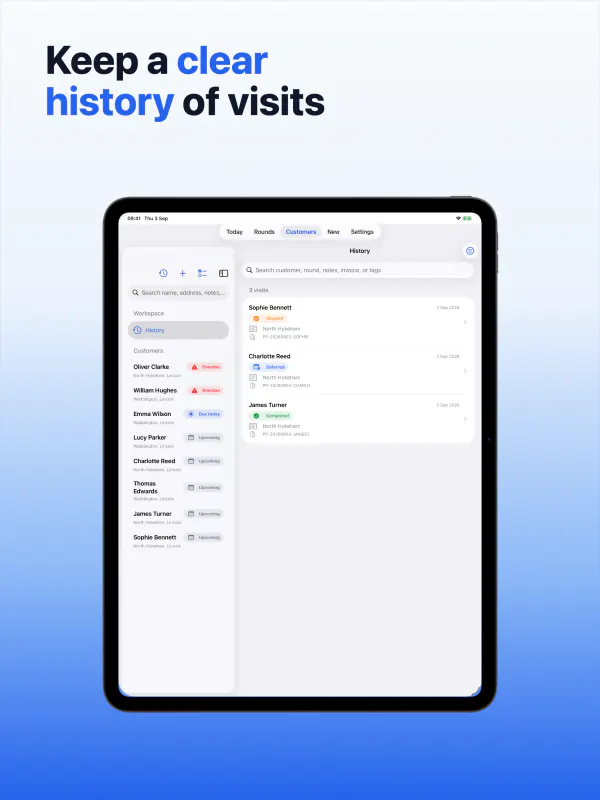
- On iPhone or iPad, open Customers and choose History. On Mac, choose History in the sidebar.
- Search for a customer, round, note, invoice reference or tag.
- Open the filters if you need a particular outcome, customer, round or date range.
- Use the photo or amount filters if they help narrow the result.
- Open the visit to read its details.
You can also open a customer and look through their history. Check the visit date before creating a PDF so you do not send a record for the wrong clean. If a visit is missing, clear filters and widen the date range first.
13. Change several customers together
Use a bulk change when several customers need the same round, scheduling or tag change. The review matters: it shows the records you are about to affect.
- Open Customers.
- On iPhone or iPad, choose Select customers, select the records and choose Continue. On Mac, select the relevant rows and choose Bulk Change.
- Choose the bulk action or operation.
- Enter the new value requested.
- Choose Review changes, or Prepare Review on Mac.
- Check the affected customers, proposed changes and warnings.
- Use the confirmation action shown in the review, or Apply Reviewed Change on Mac.
- Check a changed customer to confirm the result.
Cancel the review if the selection is wrong. Where Undo last bulk change is available, use it promptly if you made a mistake. Read any warning rather than assuming undo can replace records that have since changed.
14. Set up your business details
- On iPhone or iPad, open Settings, then Business details. On Mac, open Settings and choose Business.
- Enter the business name, address and contact details you want customers to see.
- Choose a logo image if you want one on your documents.
- Check the spelling and contact details.
- On Mac, choose Save Settings.
These are the business details used on generated documents, not the customer’s address. Check a PDF preview after changing them. On Mac, Revert returns unsaved settings to their previous values.
15. Choose document and payment details
Set the appearance
- On iPhone or iPad, open Settings, then Export branding. On Mac, open Settings and choose Documents.
- Choose a template and accent colour.
- Choose the default document type.
- Add an optional footer, such as a short thank-you or contact message.
- On Mac, choose Save Settings.
Choose payment instructions
- On iPhone or iPad, open Payment instructions in Settings. On Mac, use the payment fields in Documents.
- Enter only the account and reference details you want to give customers.
- Turn on only the fields you want included in the invoice.
- On Mac, choose Save Settings.
- Create a PDF preview and check every included detail.
Pane Planner puts your instructions on the invoice. It does not process a payment or start a bank transfer. Do not enter banking passwords, PINs or card security codes.
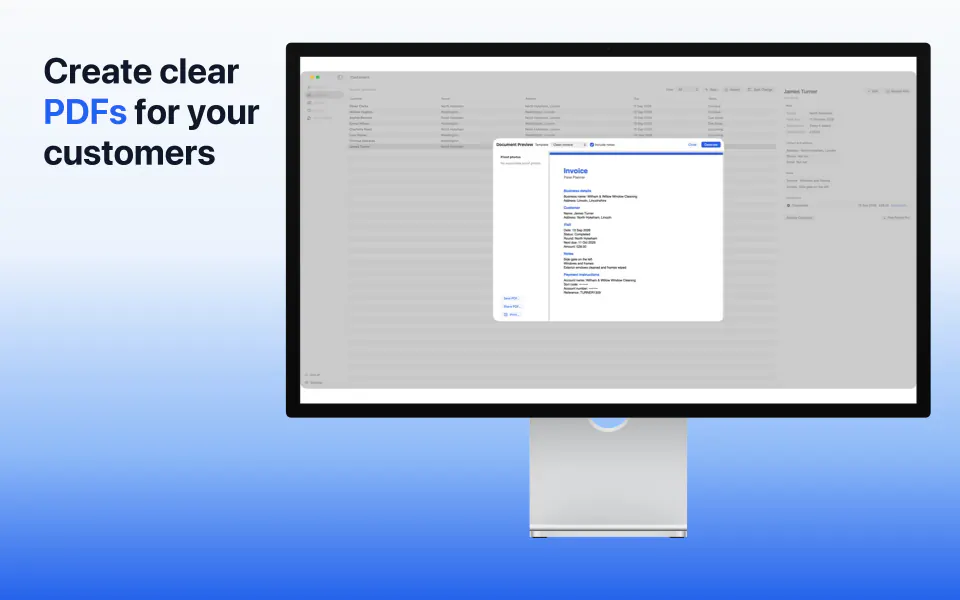
16. Create, check and send a PDF with Pro
Choose the document that fits the conversation: an invoice for the charge, a compact job summary for a short record, or a detailed visit record when the customer needs more information.
On iPhone or iPad
- Open the customer whose latest visit you want to document.
- Choose Prepare invoice PDF. Record a visit first if this action is unavailable.
- Check the template in PDF preview.
- Choose whether to include visit notes and each available proof photo.
- Read the preview, including the customer, date, amount, business details and payment instructions.
- Choose Save to keep a file, or Share to choose where it goes.
In this iPhone and iPad release, the customer’s PDF action uses their latest saved visit. Check its date in the preview. On Mac, you can choose a particular saved visit as described below.
On Mac
- Open a saved visit from History or the customer’s visit history.
- Choose Document….
- Choose the template and whether to include notes and photos.
- Choose Generate.
- Read the preview carefully.
- Choose Save PDF…, Share PDF… or Print….
To email or message the PDF, choose Mail or Messages from the sharing options available on your device. Check the recipient and message before sending. Saving or previewing a PDF does not send it to anyone. If your preferred service is not offered, save the PDF and attach it from that service yourself.
Check the saved file before you rely on it. A PDF is a separate copy: later changes to a customer or business setting do not update files you already saved or sent.
17. Export customer and visit records with Pro
- On iPhone or iPad, open Settings, then Storage and exports. On Mac, open Settings, then Documents.
- Choose Export customers CSV or Export visits CSV. On Mac these are Export Customers… and Export Visits….
- Wait for the export to finish preparing.
- Choose where to save the file, or share it using an available service.
- Open the saved file in your spreadsheet app and check that it contains the records you expected.
A CSV is useful for taking a portable copy of tabular records. It is not a complete app backup containing every draft, photo and setting. Customer import is not a promise that you can restore the entire app from a visit export. Keep exported files somewhere appropriate for customer information, and remove copies you no longer need.
18. Archive and restore customers or rounds
Archive records when they should leave your active work but you still need their history. Permanent deletion is a different action.
Archive a customer
- Open the customer record.
- Choose Archive customer, or Archive Customer on Mac.
- Read the confirmation and continue only if you want to take them out of active work.
Restore an archived record
- On iPhone or iPad, open Settings, then Capacity and archives.
- Open Manage customers or Manage rounds.
- Find the archived record and choose Unarchive.
On Mac, open Settings, choose Archive & Sync, find the archived record and choose Restore. If restoring would exceed your active capacity, deal with the warning first; the archived record remains available to review.
Before archiving a round, move or archive its active customers as the app requests. An empty round can only be permanently deleted when it has no visit history. Read the confirmation and cancel if you only meant to hide it from active work.
19. Use Pane Planner across your devices
Private iCloud sync lets you plan on Mac and carry supported records on iPhone or iPad. Use the same Apple Account for iCloud on each device. Your App Store purchase account and your iCloud account have different jobs: restoring Pro does not itself turn record sync on.
- Check that each device is signed in to the same iCloud Apple Account.
- On the device holding your existing records, open Pane Planner’s Settings.
- On iPhone or iPad, open Storage and exports and turn on Use private iCloud sync.
- On Mac, open General, turn on Sync Pane Planner records using your private iCloud account, then choose Save Settings.
- Choose Sync now, or Sync Now on Mac.
- Wait for the status to confirm the sync has finished.
- Enable sync on the other device, then check that the expected customers, rounds and visits appear.
On a new Mac, Use my existing private iCloud data offers a way to start with records already in your account. If you want separate local records instead, choose Start locally on this Mac. Avoid importing the same CSV again simply because sync is still loading.
Check the photo-sync status separately if you are waiting for proof photos. Before editing the same record on a second device, let both devices finish syncing. When a device is offline, changes cannot reach another device until it reconnects.
Turning sync off is not the same as deleting iCloud data. Sync is also not a historical backup: changes and deletions may travel between connected devices. RGT Software Ltd does not receive the customer, round, visit or proof-photo records stored in your private iCloud database.
20. Resolve a sync conflict
A conflict means Pane Planner needs you to decide which version of a record to keep. This can happen when the same record is edited on different devices before they exchange changes.
- On iPhone or iPad, open Storage and exports and choose Review sync conflicts when it appears.
- On Mac, open Archive & Sync in Settings and find the conflict.
- Read the record details and check which version contains the changes you want.
- Choose Use this device, or Use This Mac, to keep that device’s version; choose Use iCloud to keep the cloud version.
- Allow sync to finish, then check the record on your other device.
If you are unsure, leave the decision open while you check the records. Do not delete or reinstall the app to try to clear a conflict.
21. Delete local or iCloud data
Deletion is permanent. Choose the smallest action that matches your intention. If you only want to stop seeing an old customer in active work, use Archive instead. Keep any records you need before continuing.
Remove the copy on one device
- On iPhone or iPad, open Settings, then Storage and exports. On Mac, open Settings, then Archive & Sync.
- Choose Delete data from this device, or Delete data from this Mac.
- Read the warning.
- Choose Cancel to leave the data alone, or confirm the local deletion if that is what you intend.
This removes the local Pane Planner records, drafts, business details and proof photos. It does not delete the private iCloud copy. If you turn sync on again, records in iCloud can return.
Remove Pane Planner data from private iCloud and connected devices
- Make sure you are online and using the intended Apple Account.
- In the same settings area, choose Delete all Pane Planner data from iCloud and connected devices.
- Read the permanent-deletion warning.
- Type DELETE in the confirmation field.
- Choose Delete Permanently.
- Wait for the completion message before closing the screen.
This action covers Pane Planner’s customers, rounds, visits, drafts, business details and proof photos in the selected private iCloud account. A small deletion marker, with no customer or visit content, remains to tell supported connected devices not to upload old records again.
An offline device cannot receive the deletion while it is disconnected. Update Pane Planner on your devices, reconnect them and allow the deletion to be recognised before using them again. Do not manually import an old export unless you intend to put those records back.
If the operation reports an error or unfinished cleanup, follow the message and use Retry when offered. Do not assume deletion is complete. PDFs, CSV files and images already saved or sent outside the app are separate copies: remove those from their saved locations if necessary. Deleting app data does not cancel an App Store subscription.
22. Start or restore Pane Planner Pro
Pro adds more active capacity, proof photos, PDF and CSV exports, saved filters and branded document choices. One Pane Planner Pro subscription covers the iPhone, iPad and Mac apps when their App Store purchases use the same Apple Account; you do not need a separate subscription for each.
- Open Settings.
- Open Pane Planner Pro.
- Review the current options and terms shown by Apple.
- Choose an option and complete Apple’s purchase confirmation if you want to continue.
- Return to Pane Planner and check that Pro is active.
Already subscribed?
- Check that the device’s App Store is using the Apple Account that purchased Pro.
- Open Pane Planner Pro in Settings.
- Choose Restore Purchases.
- Complete any account confirmation Apple requests.
- Check the access status before trying to buy again.
If subscription options do not load, use the retry control shown and check the connection. Apple handles purchases and subscription management. Use Manage Subscription on Mac, or the subscription-management option offered on iPhone and iPad, to review your subscription with Apple. Current prices and purchase options are on the App Store.
23. Find help when something goes wrong
A customer or visit is missing
Clear search and filters, check archived customers, and look in Saved drafts if the work was not finished. If the record was made on another device, check sync status on both before creating a duplicate.
The CSV import will not apply
Review the error count, row actions, required name mapping and active-capacity warning. Correct the original CSV and import again if the values themselves are wrong. Applying a smaller reviewed set is safer than guessing how unresolved rows should be treated.
A route leaves out an address
Open the customer, check the full address and postcode, and try the individual Maps action. Keep your own order if the suggestion is not useful. Do not change correct customer details simply to force a route result.
A PDF or export has not appeared
Wait for preparation to finish, check for a Pro or error message, then choose a save destination. Previewing a document is not the same as saving it. Open the chosen folder or Files location and check the actual file before closing the app.
Sync is waiting or has failed
Check the internet connection and iCloud account, then choose Sync now and read the result. Check for a conflict or photo-sync warning. Do not repeatedly import your customer list, delete the app or erase iCloud data as a troubleshooting shortcut.
The app says it could not save
Keep the form or draft until you have checked the result. Read the error, check available device storage and use Retry where offered. Do not assume the operation succeeded simply because you pressed Save.
Contact support
See Pane Planner Support, or email support@rgtsoftware.com. Tell us what you were trying to do, the buttons you chose, what happened instead, your device model and the app version. A screenshot of the message can help; hide customer names, addresses and other private information first. Never send passwords or payment credentials.
For how information is handled and the terms of use, read the Privacy Policy and Terms.